Open the details pane to view or change the expiration date.
There are a couple of different ways to get there:
-
Click on the recording to open it in your browser. Once the browser page has opened, select  in the upper right to open the details pane.
-
Or, go to My files in your OneDrive or SharePoint site and view as a list. Mouse over the recording in question, select Show actions (the three vertical dots to the right of the file name), and then choose Details.
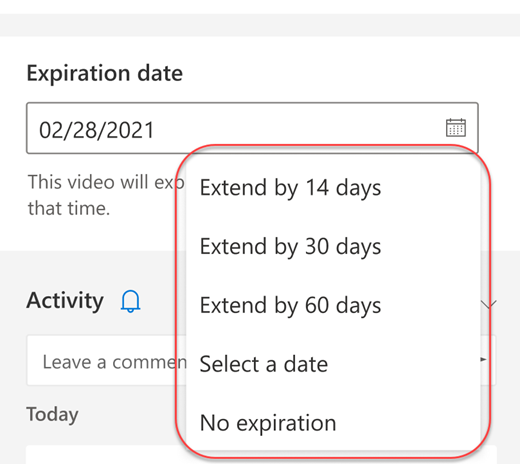
When the details pane is open, look for Expiration date. Here's where you'll see the date that's currently set.

Open the drop-down to see your options for changing the date. Extend the recording's availability for a certain number of days, or pick a specific date on the calendar. You can also choose No expiration if you don't want it to be deleted.
Notes:
-
The message indicating that your recording will expire will persist on the recording in the chat even if you remove the expiration date. But don't worry—if you've selected No expiration, it won't expire.
-
The owner of the recording will get an email when it expires. At that point, they'll have up to 90 days to recover it from the recycle bin. Once recovered, the recording will no longer expire automatically.
-
Watching the recording won't affect the expiration date.
-
More info for admins can be found here.